Dry Run
Revision History
09/14/2023: Initial Checklist / Procedure (Marcus Behel)
Follow these sections in order!
Connect to System
- Connect BOTH batteries to the robot (this is important! LBB is known to misbehave a little if the robot is powered on with only one battery present!)
- Power the robot on using the system switch
- Connect the teather to the endcap, and the other end to your computer
- Wait up to 2 minutes for your computer to connect to the jetson by ethernet. Once connected, continue.
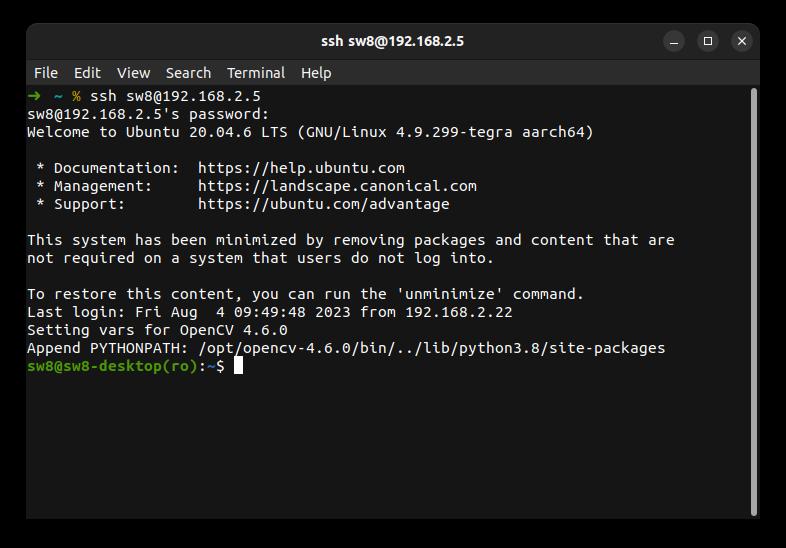
- SSH into the jetson by running the following command in a terminal (works on windows too)
ssh sw8@192.168.2.5 - If prompted about a "fingerprint" enter "yes"
- Enter the password when prompted (ask other members if you don't know the password; I can't put it in public docs!)
- Once you've entered the password, you'll have a ssh session connected to the jetson. You'll see a shell from the jetson in your terminal now.
Verify everything Connected to Jetson
Run the following commands in your ssh session.
First make sure all necessary UART devices are present
ls /dev/serial/by-id/
You should see several devices. Make sure the following exist - One control board - Two "TI MSP430" devices (MEB, it's actually just one device but shows up as two) - Two "Digilent" devices (Acoustics FPGA, it's actually just one device, but shows up as two)
Example output:
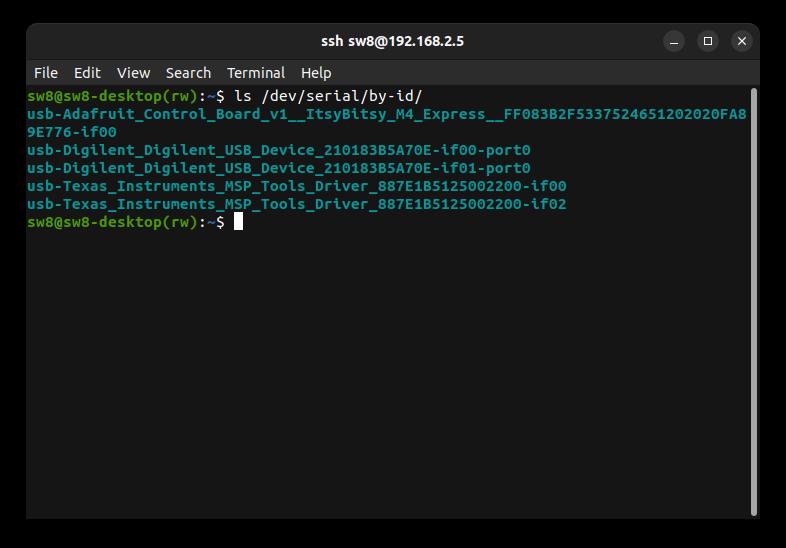
Note: the output sill vary slightly (these names include serial numbers). Also, the control board may be either Adafruit or STMicroElectronics.
Then, make make sure cameras are connected
v4l2-ctl --list-devices
You should see two ArduCam devices (two different sections as shown below!)
Example output

Test Arm & Kill
- Arm the robot using the hardware arm switch. Thrusters should not beep yet (if they do, software kill is either broken or disabled).
- Run
./arm.shto software arm the robot. Thrusters should now beep. - Kill the robot using the hardware switch.
- Wait 3 seconds
- Arm the robot using the hardware switch. Thrusters should now beep.
Motor Test
Note: This assumes AUVControlBoard interface scripts are located at ~/AUVControlBoard_VERSION on the jetson (replace "VERSION" with whatever version is on the jetson; run ls ~ to list what is on the jetson)
Follow the above instructions to determine where the control board scripts are (determine the version).
Run the following commands. The last command is a script that will prompt for dry run settings (speed and duration). Just press enter twice for default settings. Then, type each thruster number followed by enter and make sure that thruster moves. After testing all thrusters, type "q" and press enter to exit.
cd ~/AUVControlBoard_VERSION/   # Change VERSION!!!
cd iface
./launch.py example/motor_test.py
Note 1: If you get error 255 from the control board scripts, this indicates a timeout occurred. This is likely not a communication error with the control board. Just re-run the script and try again. It should work.
Note 2: If you get errors about communication with the control board (unable to open port, errors other than 255), you may need to specify a port (launch.py defaults to /dev/ttyACM0). To check the port run realpath /dev/serial/by-id/*Control_Board*.
If any of the following occur, fix them!
- Wrong thruster numbers moving
- Thrusters not moving when their number is entered
- Thrusters moving "weakly" or "clicking" while moving (usually means power pole block is not seated properly)
LBB Test
- Disconnect one battery
- Repeat the motor test
- Plug the disconnected battery back in
- Disconnect the OTHER battery
- Repeat the motor test
The motor test should work off either battery on its own. If it is not, the LBB may not be working or one battery may not be working (check fuses, voltage on fischer, etc)
MEB Communication & Voltage Monitor
Note: this assumes the MEB scripts (https://github.com/ncsurobotics/SW8E-MEB-Software scripts folder) are located at ~/meb-scripts on the jetson.
Run the following command to determine what UART port MEB is
realpath /dev/serial/by-id/Texas_Instruments_MSP_Tools_Driver_*-if02
Run the following command. Replace PORT with the port from the command above.
cd ~/meb-scripts/
python3 read_sys_voltage.py PORT 57600
Make sure correct battery voltage is being read. Hold CTRL and press C (CTRL+C) to exit the program.
If the wrong voltage is read, the voltage monitor is not working.
If you get serial communication errors, MEB may not be communicating properly (or you may be using the wrong port).
MSB
Note: this assumes the MEB scripts (https://github.com/ncsurobotics/SW8E-MEB-Software scripts folder) are located at ~/meb-scripts on the jetson.
Run
cd ~/meb-scripts/
The MEB is used to communicate with MSB, thus remember the PORT you used in the previous section and use it again in the following commands.
The general format of the commands you will run are as follows (do not run just yet)
python3 msb_command.py PORT 57600 CMD
You will need to run this command multiple times, replacing CMD with something different (make sure to replace PORT!)
You will need dropper makers loaded to observe correct behavior, but loading torpedoes is discouraged.
# Droppers should hold markers and torpedoes are in loaded position
python3 msb_command.py PORT 57600 reset

# Drop marker 1
python3 msb_command.py PORT 57600 d1_trig

# Drop marker 2
python3 msb_command.py PORT 57600 d2_trig

# Fire torpedo 1
python3 msb_command.py PORT 57600 t1_trig

# Fire torpedo 2
python3 msb_command.py PORT 57600 t2_trig

# Droppers hold markers and torpedoes return to loaded position again
python3 msb_command.py PORT 57600 reset
Acoustics System
TODO: This will be written once there is a stable test interface for acoustics. For now, refer to the acoustics project people and have them test what they want.
Camera Stream Test
Note: this assumes the starstreams.sh script (https://github.com/ncsurobotics/SW8S-Camtest) are located at ~/camtest on the jetson.
Note: On current images, rtsp-simple-server is not started automatically. Thus for now you first need to run the following
cd ~/rtsp-simple-server
nohup ./rtsp-simple-server &
Then, run
cd ~/camtest/
./startstreams.sh
Note: this script will not exit on its own unless it fails. If it exits on its own, the cameras are probably not connected!
Next, you need to use VLC on your computer to view the streams and make sure they are working. Note that the streams will be "delayed" when viewing with VLC, but this is OK. To view with less latency, you can install mpv and use the playstreams scripts in the camtest repo (if you don't know what this means, just test with VLC).
To view with VLC
- Leave the ssh session open
- Launch VLC
- Media > Open Network Stream
- Enter
rtsp://192.168.2.5:8554/cam0 - Click "Play"
- Wait until you see the stream
- Close VLC
- Repeat to play
rtsp://192.168.2.5:8554/cam1 - Wait until you see the stream
When done, run the following on the jetson. Before running, press CTRL+C to kill the startstrams script so you get a shell prompt again.
killall rtsp-simple-server
Power off Safely
Run
sudo poweroff
Then wait 30 seconds before turning the system off with the system switch.